Applies To: ■ PoliteMail Desktop ■ PoliteMail Online ■ PMUA □ PoliteMail M365
Version: □ 4.94 □ 4.97 ■ 5.x
Measuring iOS and macOS Devices
Background
Email is typically tracked and measured using small transparent images, which are remotely hosted and referenced over the internet using a standard web http/https request. Sometimes called “tracking beacons” or “invisible tracking pixels”, such images are not nefarious, but do allow data collection regarding when, how often, and from where an email is opened, or a web page is viewed.
All http/https web requests, including any web page visit you make and any email link you click, contain data such as your IP address (from which location can be ascertained) and device information such as browser and OS.
Since Outlook 11 for Mac was released, remotely hosted images are blocked by default on the Outlook desktop, Outlook online and Outlook Web Access (OWA). The email recipient can enable them for any particular message by clicking their consent. This is done by clicking the “click to download pictures” at the top of the email message, or by making a global setting to always download image content, which will display the images. Mobile Outlook versions for iPhone and Android do not block by default, but it is a user option.
The Challenge
With iOS15, Apple introduced Mail Privacy Protection, which further reduces email data collection. MPP hides your IP and loads images in the background by routing http/https requests via proxy servers, with a generated, regional IP address. These proxy downloads will make every email appear to be “opened” whether the recipient ever really opens it or not.
Ultimately this means, for your employee audience using Macs and iOS devices, your email data will be far less accurate.
For mobile users with their email configured to use Outlook iOS, open measurement will work the same as it does now. However, for recipients with their email address configured to the iOS Mail application, the open images will be cached (auto-opened) by Apple resulting in 100% open rates for any email sent to the that address. That means your open rates in general will be highly exaggerated by the percentage of users with their company email configured to iOS mail.
This is the opposite for Outlook for Mac desktop users, which will block images, preventing opens from being measured and resulting in under reported open rates for those recipients.
The Solution
Microsoft 365 Measurement offers non-image based open measurement methods to effectively capture accurate Mac desktop and iPhone open data.
By implementing the 365 Measurement feature, PoliteMail addresses the “open inflation” issues by effectively filtering out proxy opens, as well as offering proprietary techniques to correctly calculate unique interactions from any Outlook client, including Windows, Android, Mac and iOS.
PoliteMail Measurement by Device
| iOS Measurement | 365 Measurement | Open Measurement | PoliteMail v5+ | |
|---|---|---|---|---|
| Mac + Outlook | ✖ | ✔ | ✖ | ✔ |
| Mac + Mail | ✔ | ✖ | ✔* | ✔ |
| iPhone + Outlook | ✖ | ✔ | ✔ | ✔ |
| Windows + Outlook | ✖ | ✔ | ✔ | ✔ |
| Android + Outlook | ✖ | ✔ | ✔ | ✔ |
| Android w/out Outlook (Samsung Mail, etc) | ✖ | ✖ | ✔ | ✔ |
| iPhone + Mail | ✔ | ✖ | ✔* | ✔ |
| Gmail | ✖ | ✖ | ✔ | ✔ |
* Works prior to iOS 15 and on iOS 15 with Mail Privacy Protection off.
How to Enable 365 Measurement for PoliteMail
This configuration should be completed by your Admin as part of the implementation process. Once enabled, 365 Measurement will be applied to all outgoing measured messages.
After implementation, a System Administrator must go to Settings > Software Scaling, and set Enable 365 Measurement to TRUE for it to be active.
The user has the option to disable 365 Measurement for individual messages.
To enable 365 Measurement:
- Your send from address must be authenticated via a Microsoft standardized form which will be sent to, and authorized by, one of your Office365/Exchange administrators. Go to POLITEMAIL> Account>M365 Measurement.
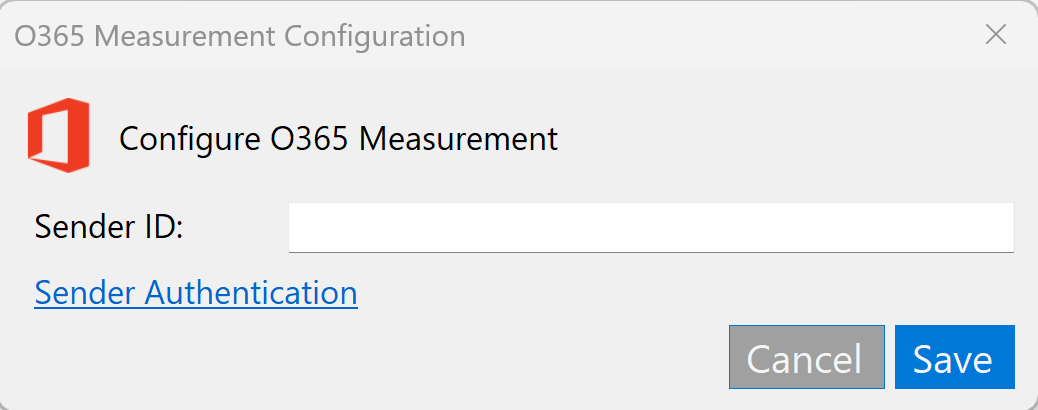 The 365 Measurement configuration window will now appear. The user must have a Sender ID in order to use 365 Measurement. This ID is generated by the Actionable Email Developer Dashboard by Microsoft. PoliteMail provides two options – either do automatic setup by clicking the Sender Authentication link, or use the Advanced Setup link to input all the data manually. (The Sender Authentication link will display in the desktop version of PoliteMail only).
 The 365 Measurement configuration window will now appear. The user must have a Sender ID in order to use 365 Measurement. This ID is generated by the Actionable Email Developer Dashboard by Microsoft. PoliteMail provides two options – either do automatic setup by clicking the Sender Authentication link, or use the Advanced Setup link to input all the data manually. (The Sender Authentication link will display in the desktop version of PoliteMail only).
Sender Authentication (recommended)
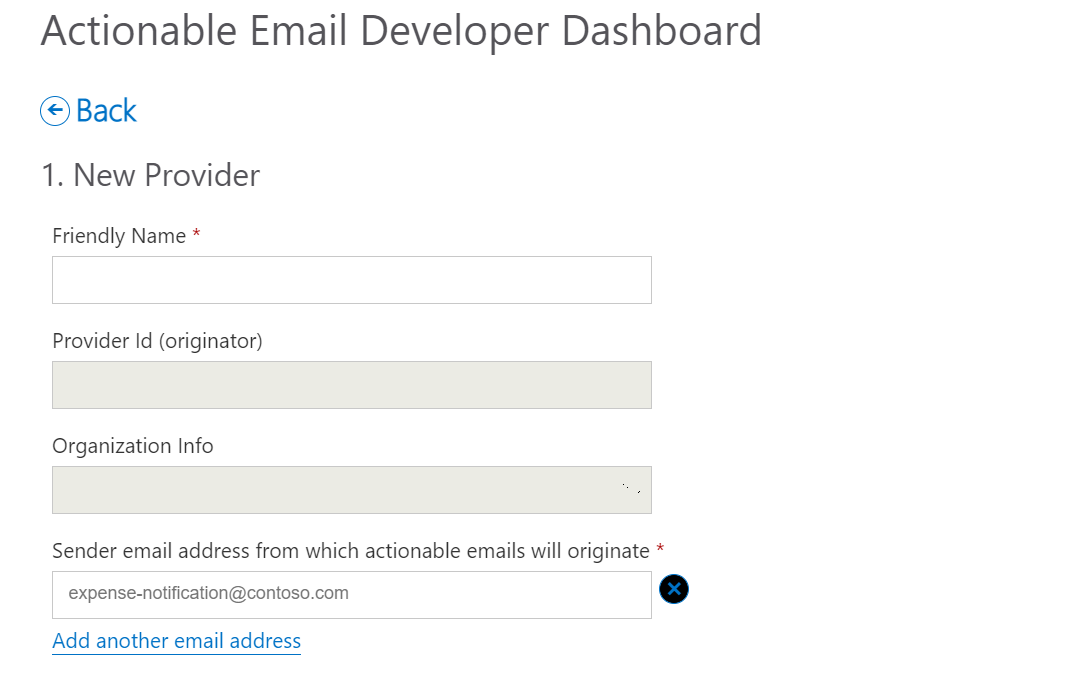 After clicking on Sender Authentication, you may be asked to sign in again. From here, the Actionable Email Developer Dashboard will open, and you will see that all of the fields will be auto-populated using your user information on the PoliteMail server.
- Under New Provider, you will see a Friendly Name field, which you can change if needed. Next will be the Provider ID and Organization Info. The Provider ID is what will be auto-populated in the Sender ID field to complete 365 Measurement set up.
- Next, you will see your email listed in the Sender Email Address field. All the shared mailboxes that are set up on your account will appear here. If you have additional email addresses that you send from, please click the Add another email address link and fill out the address.
- Target URL is what the recipient’s email client is going to use to parse actionable card that’s embedded in the message by sending a request to the server listed. You should see your company’s server name listed there. A typical target URL is your hostname preceded by https://, such as https://release.pmail2.com.
Both the hostname and readhost name (tracking beacon) must be entered for a read host setup, or you can use a wildcard or regex in the hostname (such as *.companyname.com) that can apply to both. If using only a host setup, just the hostname is needed.
- You can typically leave the Public Key section blank for setting up M365.
- Under Scope of Submission, the Organization scope is automatically filled in, as this is the most common choice. This will send a request to your organization’s Exchange administrators to approve the 365 Measurement. If you would like to test it out first, you can use the Test Users option. Choosing the Global option will apply 365 Measurement to any Microsoft 365 tenant and required approval by Microsoft. The approval process could take anywhere up to two weeks.
- Finally, under Additional Information, you can add any additional addresses of other people who should be notified of your request for 365 Measurement, as well as any additional comments (the Exchange Administrator's name needs to be added, at the very least). To finish configuration, accept the terms and conditions by checking the box, and then click Save.
- Once the window closes, the Sender ID will be auto-populated in the Sender ID field. Now click Save.
- Your Exchange Administrator will now need to approve your request. Once approved, you can start sending emails with 365 Measurement.
Advanced Set up
Please note your token and M365 configuration must be updated to Entra ID Token Authentication by May 15, 2026; External Access Tokens (EAT) will not be accepted by Microsoft after this date, and PoliteMail will display 'Preparing Message' during sending. Please see this article for more information.
Clicking Advanced Setup brings you to the Actionable Email Developer Dashboard, where you have full control of adding the email addresses, contact information, publisher information, etc. Once you have filled everything out, you must agree to the terms and conditions, and then click Save to submit the request to your Exchange Administrator.
Note that Microsoft sets a maximum of 10 shared mailboxes that you can send from. You will need to enter your shared email addresses in the field titled, "Sender email address from which actionable emails will originate". Sending from more than ten will require the use of different Provider/Sender IDs.
Disabling 365 Measurement
Once 365 Measurement has been enabled, it will be applied to all outgoing measured messages. To remove it, open a New Email and then click the pull-down menu under the blue PoliteMail flag. Choose Disable 365 Measurement, Disable iOS Measurement, or both. Disabling these measurement methods will rely on Open Measurement to collect metrics, which may cause inflation if the recipient is using iOS15 or macOS.
Actionable Message Debugger
 While using Actionable Messaging, it is a good idea to have the Actionable Messaging Debugger add-in installed. If a recipient gets a message with “Preparing message” at the top, the debugger will allow developers to inspect the card payload and identify why it’s not rendering. Go to Get Add-ins in the Outlook ribbon, and then perform a search for “Actionable Messages Debugger for Outlook”. Once installed, you can click on any sent or received message to inspect the card payload.

