Applies To: ■ PoliteMail Desktop ■ PoliteMail Online ■ PMUA
Version: ■ 4.9 ■ 5.0 ■ 5.1+
This procedure only applies when sending via Outbox, or when adding the From Address from the Global Address book. It gives the user permission to send from that email address without tracking turned on.
For sending via the PoliteMail Server, please consider using From Verification as a method to manage your allowed From Addresses.
To send from multiple email addresses, you may need to set-up multiple Exchange (or POP) email accounts, either for managing email and calendars for an Executive, an alternate email account for yourself, or when using a common group mailbox.
The delegate method is best used when you are authorized to have direct access to the other person’s Inbox within your Outlook, or need to manage multiple Exchange accounts from one profile. The configuration steps are provided below or from Microsoft.
The POP method is best used when you do not want multiple Inboxes, are sending from multiple email addresses within your own email account, are not managing another person’s Inbox or Calendar, or are not using Exchange Server. See the article Pop, IMAP, and SMTP settings for Outlook.com for instructions on using that method.
In Exchange 2013+, you may set-up multiple Exchange accounts (multiple inboxes) using the standard email account setup procedure.
Delegate Method (Send on behalf of) For you (account A) to send from another user (account B), then account B must provide you delegate access and permission. Then you can send messages and meeting requests on behalf of account B by entering their name (email address) in Outlook’s From field. To set-up Account A to be able to send from (and access the Inbox/Calendar) for Account B:
- Start from Account B’s system (or network account), log on and open Outlook.
- Go to File > Account Settings > Delegate Access
- Click Add, and then select the name for the user of account A. Click Add again, and then OK.
- In the Delegate Permissions dialog, click to select Editor (can read, create, and modify items) for the items the owner of account B wants to provide you with access to.
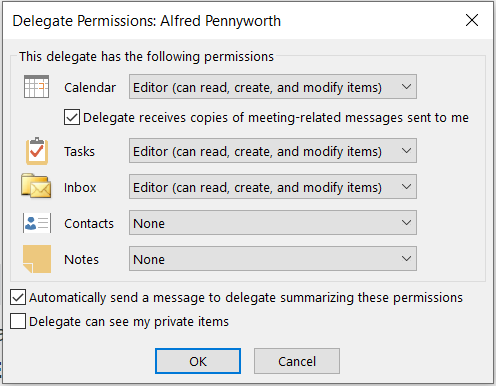
- Click OK to close the Delegate Permissions and exit Account Information.
- In the Mail Folders List, right-click Mailbox – user name, and then click Folder Permissions.
- On the Permissions tab, click Add.
- Type or select the name for the user of account A, click Add, and then click OK.
- In the Name box, click to select the newly added entry for account A.
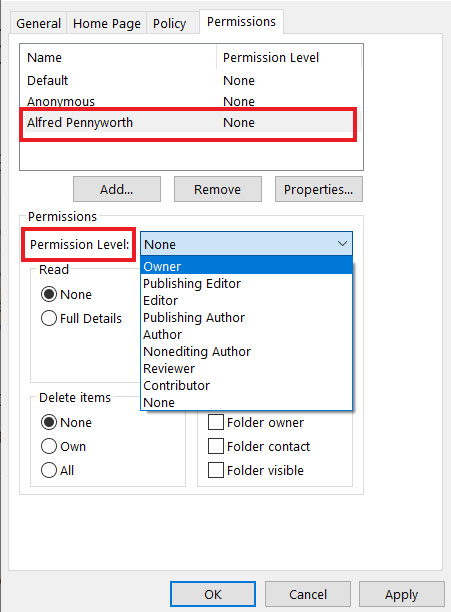 In the Permission Level pull-down menu, select Owner and then OK.

 In the Permission Level pull-down menu, select Owner and then OK.
This will provide Inbox access and Send from capability. If you need to share other folders, repeat steps 7 through 11 for the other folders in the mailbox.
You are done with the set-up for account B.
Now you have to complete the configuration for your account (account A).
- Start from your (account A) system (or network account), log on and open Outlook.
- Go to File > Account Settings and then click on Account Settings from the pull-down menu.
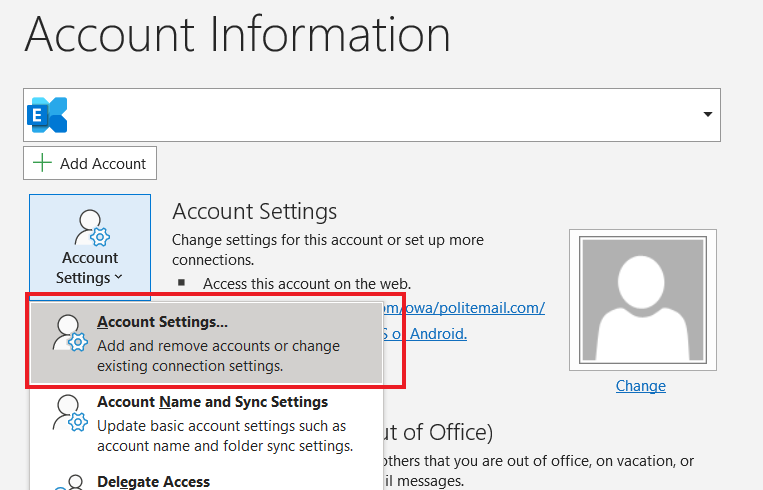
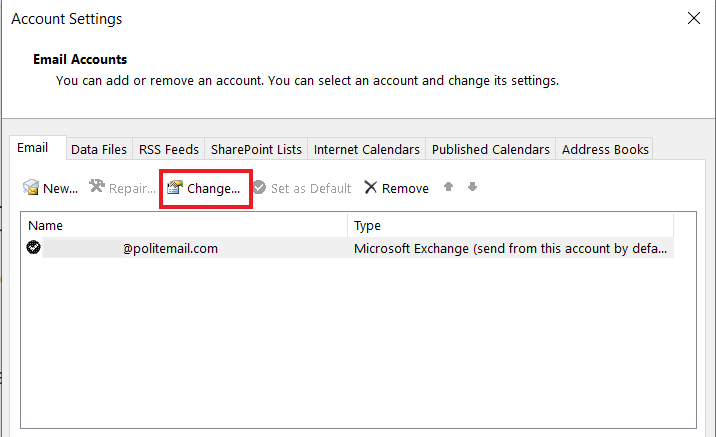
- On the E-mail tab, click the name of your primary account, and then click the Change icon.
- Click the More Settings button at the bottom of the window.
- Click the Advanced tab, then click Add and type the email address of account B, and then click OK to close the three dialogs.
- Click Next, click Finish, and then click Close. The mailbox for account B appears in your (account A) folder list.
- To send from the account B address, start a New Outlook message.
- Click Options > Show From Field
- Click From, then select the Name (account B) you want to send from
- Now Send your email, and the From within the Inbox will appear as the Name of account B, when the recipient opens the message (or displays in the preview pane) it will show it as sent from you (your name) on behalf of the sender’s name (account B).


