Applies To: ■ PoliteMail Desktop ■ PoliteMail Online ■ PoliteMail M365
Version: ■ 4.9 ■ 5.0 ■ 5.1+
Click here for version 4.9 instructions.
Enable HTML Personalization
PoliteMail gives you the option to import a customized field with HTML code from a .csv file and have this field appear as a Personalization option in your PoliteMail email messages.
Your first step is to enable HTML Personalization on your Server. On-premise clients can view this from the server; if you’re on a cloud installation, please contact PoliteMail Support to have this enabled.
- Go to the PoliteMail Management Console > Advanced.
- Enter <add key=”AllowhtmlPersonalization” value=”True” />
Note: If using a multi-server configuration, please add this key to the PoliteMailSendService.exe (config) instead of the PoliteMail Server Manager.
By default, PoliteMail provides users with an unlimited amount of custom fields; if you are using a version of PoliteMail earlier than 4.94, however, you are limited to 20 custom fields.
PoliteMail 5.0 or PoliteMail online
PoliteMail gives you the option to import a customized field with HTML code from a .csv file and have this field appear as a Personalization option in your PoliteMail email messages.
Set Up Your Custom Fields
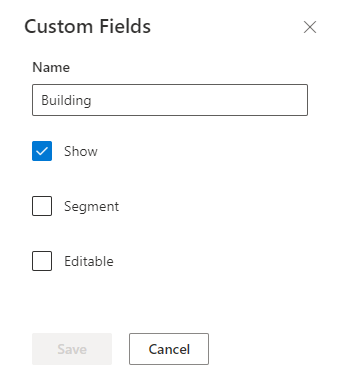 It’s helpful to set up your Custom Fields in PoliteMail before you import your lists. Navigate to POLITEMAIL> Account > Custom Fields. Click on the custom field you want to edit, then type in the name in the edit fields window. In this example, we'll set the name as "Image 1." You can also decide whether the field should be shown in the default view, able to be segmented for reports, or made editable. Once you’ve finished Editing, click Save.
You now have your Custom Field ready to use.
Importing a .CSV File
Now go to your mailing list and add a column for your HTML. Name this column Image 1 and fill out the appropriate HTML. Save your file as a .csv.
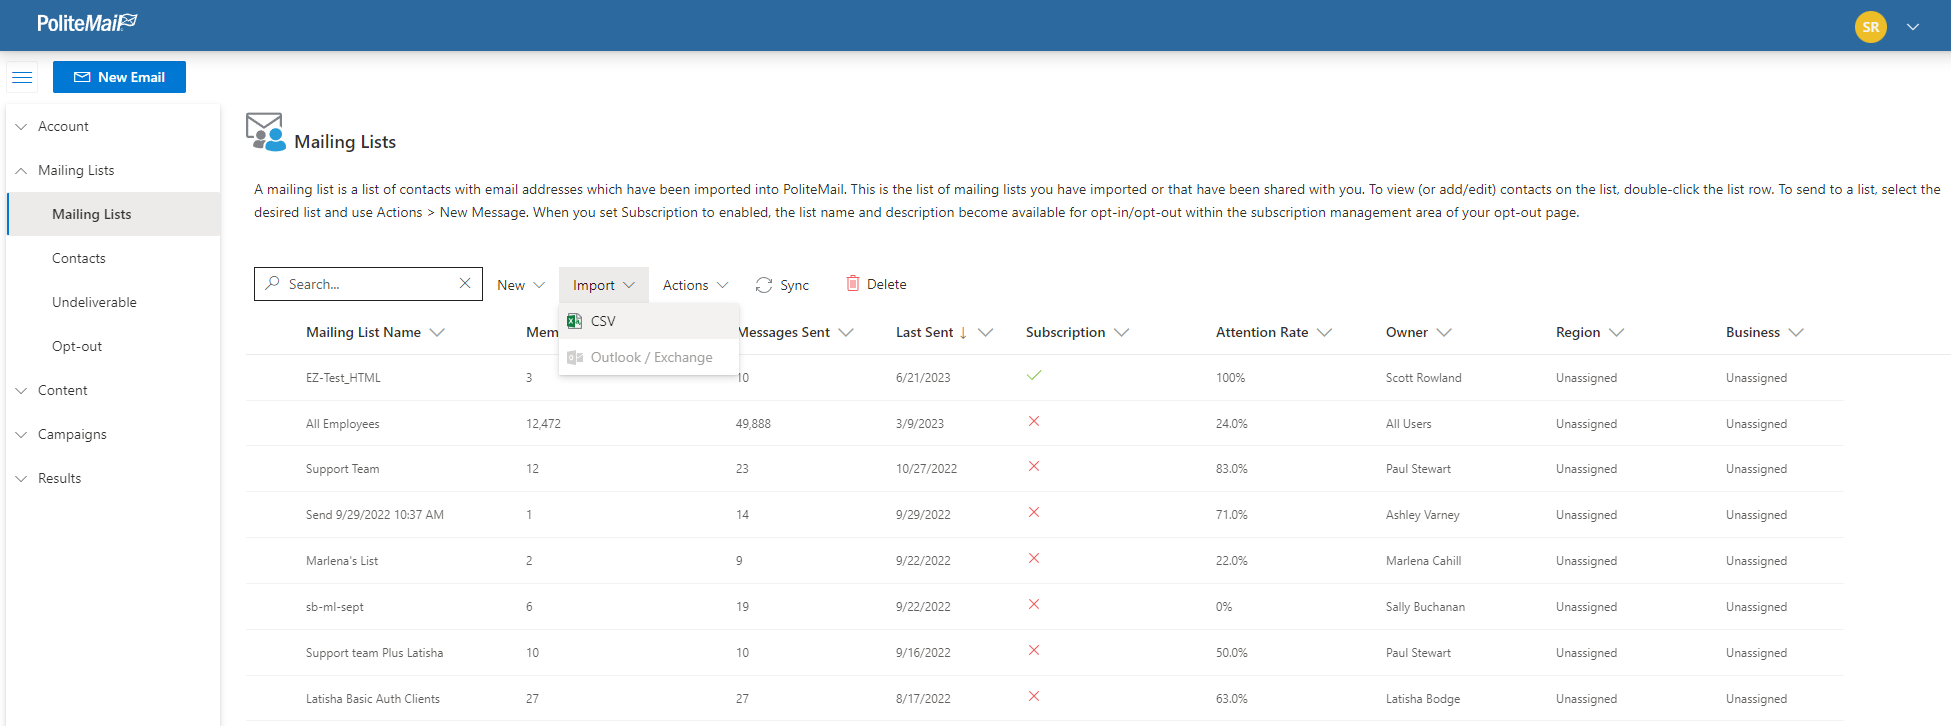
Next, go to PoliteMail > Lists > Mailing Lists. Go to Import and choose CSV or Outlook/Exchange.
In the Import Contacts dialogue window, check the box for "Has Column Headers." On the second page, choose Image 1 under the Custom Field pull-down menu.
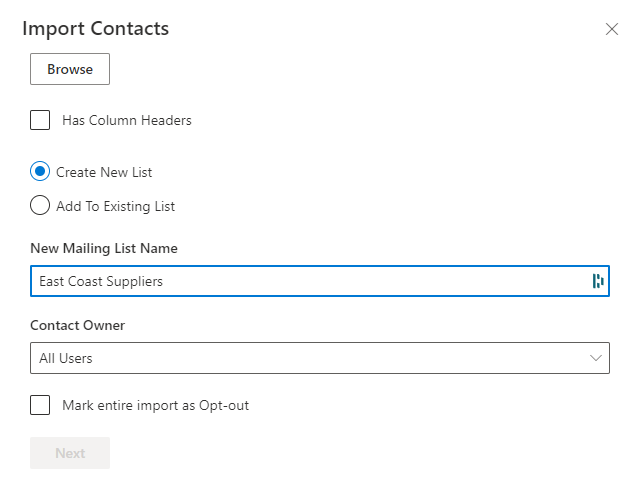
Now you will have your list imported with the HTML code assigned to the Custom Field. If you do not see the custom field for "Image 1," click on the header row and select it from the pull-down menu.
Inserting a Custom HTML in a PoliteMail Message
Compose your email in PoliteMail and put the mailing list in the To: field. Measurement mode must be set to Individual or Anonymous. Where you want the HTML to be inserted, place your cursor, and then go to PoliteMail > Personalize > Custom. You will see Image 1 listed among the available fields.
Choose that, and then your HTML will appear in your PoliteMail message as whatever number Custom Field you have assigned to it in brackets.
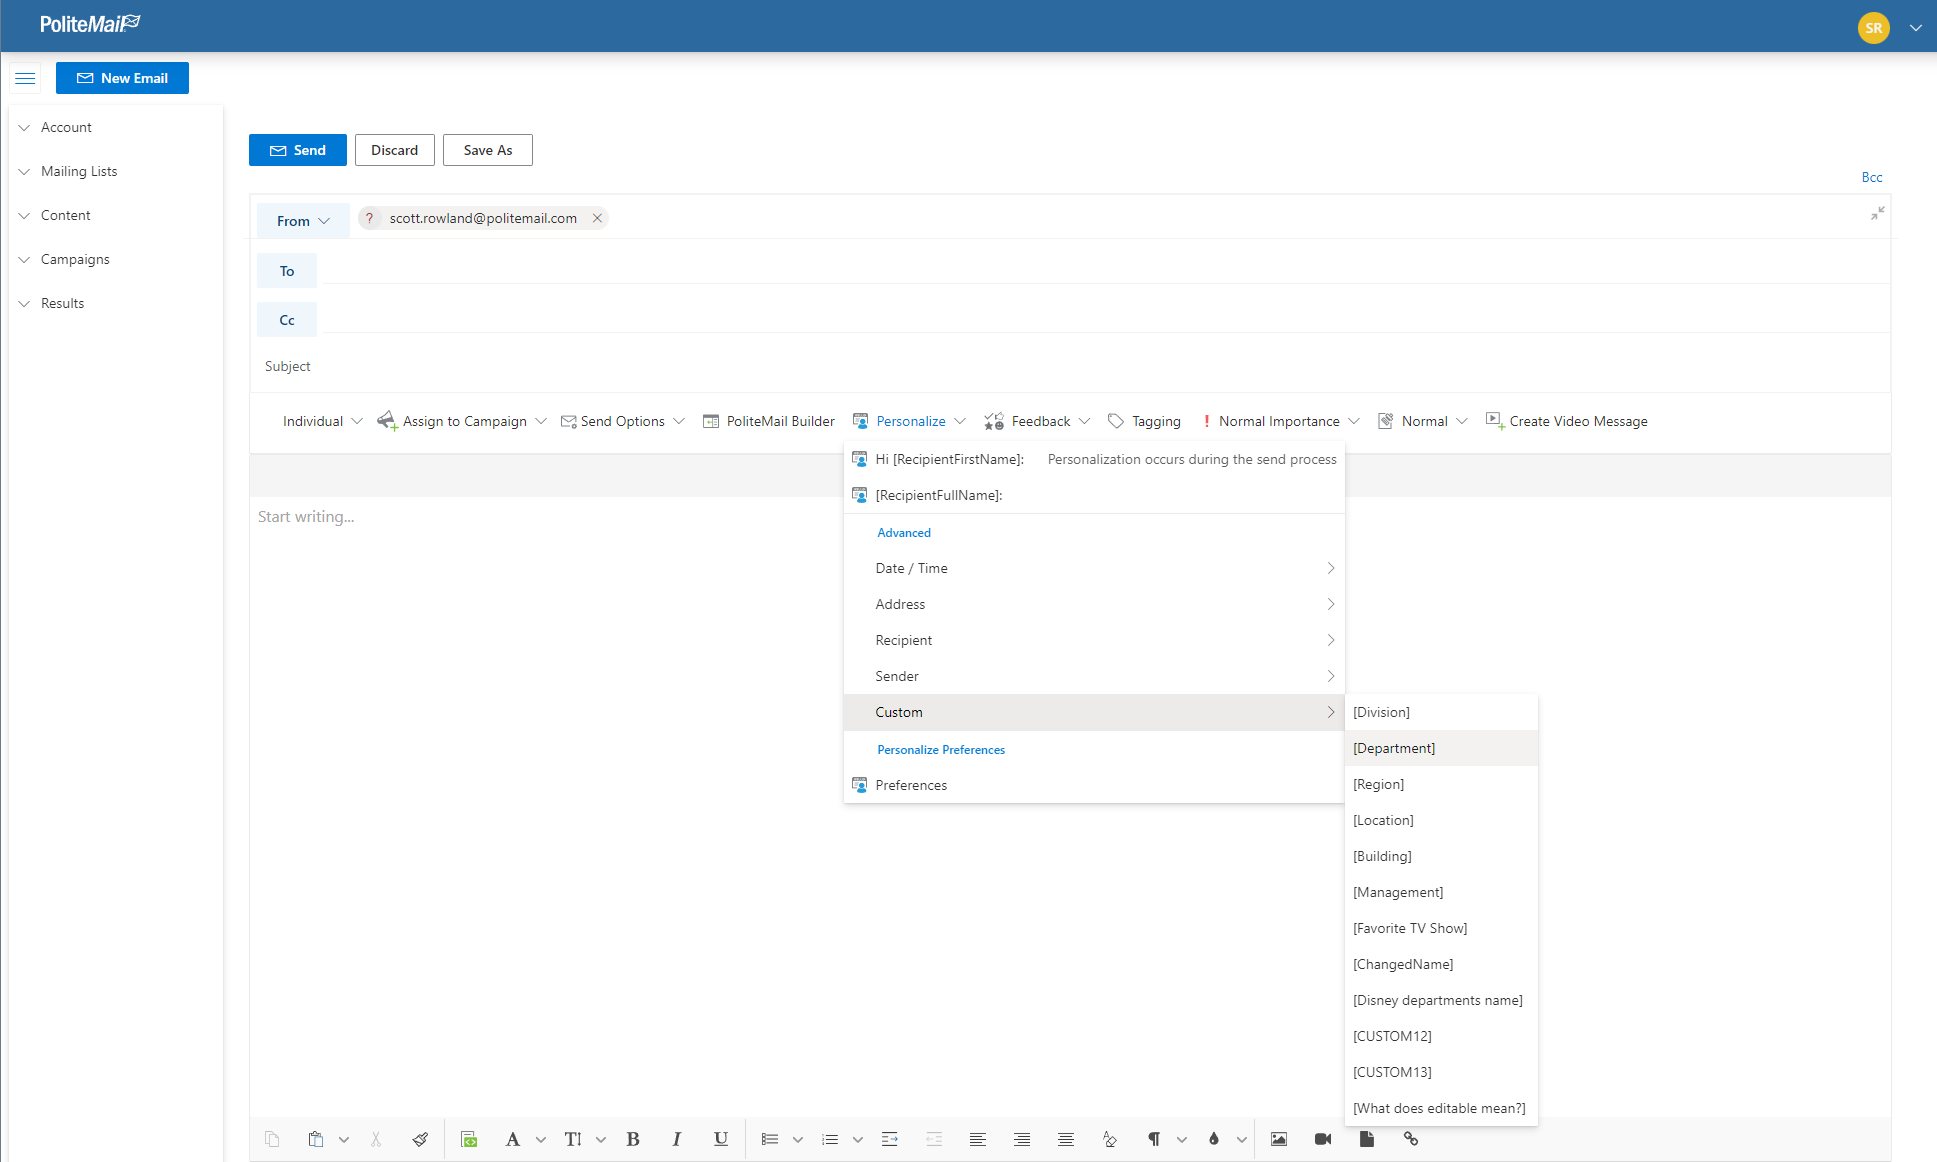
Each HTML placeholder will need to have its own dedicated Custom Field. In subsequent emails, the user will need to change the HTML code in the Image1 field to upload new images.
