Applies To: ■ PoliteMail Desktop ■ PoliteMail Online ■ PMUA ■ PoliteMail M365
Version: ■ 4.9 ■ 5.0 ■ 5.1+
Tagging, Campaigns, and Tag Groups - What's the Difference?
A Campaign consists of any number of Messages that you might want to monitor the results of, such as a monthly Newsletter or Quarterly message from the President. You can create a Campaign and add Messages as you go along - you don't have to have all Messages already created.
Tags are useful if you need another way to sort or view your Metrics. For example, perhaps you have Messages about Benefits or Open Enrollment, some of which are part of a Campaign, and others that were not assigned to a Campaign at all. Tags can be used when a Message is created. You can even assign more than one Tag to a Message, and search for all Messages containing a specific Tag. From there, you can assign those Messages to a Campaign to produce a Metrics report just on those Messages if you wish.
- In addition to assigning a Tag to a Message, users can also assign a Tag to any Content item. Those items can then be easily found by entering the Tag in the search bar in either the Content List or the PoliteMail Builder.
- Tagging is not currently supported in the Beefree Editor.
Tag Groups are different and are set up only by Administrators. An Administrator can create a Tag Group (which is, um, a group of Tags) and optionally require users to select a Tag from the pre-defined Group, allowing for better control and consistency. Creating a Tag Group is done under Account > Tag Groups.
Adding or Creating Tags
Adding Tags to Content
- To add a tag, select the content item to open the side panel (single-click in PoliteMail for the Desktop, double-click in PoliteMail Online). You will see the Tags field at the bottom.
- Enter any tags you wish, pressing <Enter> after each. As you type, existing tags will appear so you can select one of them if you wish.
- When finished, the tag icon will appear dark gray, indicating there have been tags assigned to the template.
Adding Tags to Messages
You can choose tags either before or after composing your message. Click which one you want to view:
In PoliteMail for the Desktop, click the 'Add Tag' button in the Ribbon toolbar. In PoliteMail Online, click the Tags button in the top bar. Select a Tab Group from the first drop-down, or select 'Uncategorized', then select an existing Tag or enter a new Tag in the second drop-down. Click the +Add button until you've added all the Tags you want.
Go to Account > Results and find the Message to tag. Select it and then click on Actions at the top of the list and select 'Edit Message Details'. A panel will open where you can select the Tag Group and Tag. Add any Tags you want by selecting a Group and Tag and pressing the Add button, and then click 'Save'.
Deleting Tags
Version 5.0: To delete any tags, hit the X icon next to the tag you wish to delete. To delete an entire Group, select the group and click the Delete icon.
Version 4.9x: To delete any tags, hit the trashcan icon next to the tag you wish to delete. To delete an entire Group, click the Tag icon with the red X.
Editing Tag Groups
Administrators can manage and sort Tags in the Account Settings:
Version 5.0: Select the Group and click to open the popup window. From here, you can edit the Required and Predefined boxes, edit the caption, or change the name of the Group. Click Save when you are finished.
Version 4.9x: Click the white pencil icon. From here, you can edit the Required and Predefined boxes, edit the caption, or change the name of the Group. Click Update Tag Group when you are finished.
Searching by Tag
Go to PoliteMail > Results > Messages
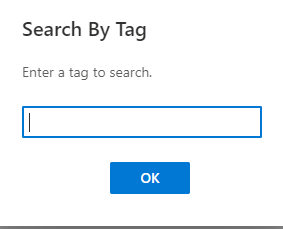 From the Actions menu choose Search by Tag.
Type in your search parameter and all messages with that associated tag will be listed. The Admin user could then view the metrics for these tagged messages, or export the tagged messages.
Admin users can also edit tags on messages already sent. Highlight the message you want to edit. Click on it to open the popup window. You can now choose which tag you want to change. In this example, the Admin is changing the tag from Pacific Region to Southeast Sales Region.
Searching for Tagged Content
From any Content list or the PoliteMail Builder, use the search bar to enter the desired Tag and press Enter. A list of matches will display.

