Applies To: ■ PoliteMail Desktop ■ PoliteMail Online ■ PMUA
Version: ■ 4.9 ■ 5.0 ■ 5.1+
Personalization
Sometimes it would be a nice touch to add the recipient's actual name or other information to your message, similar to a Mail Merge in Microsoft Word. Personalization lets you do that!
You can insert any number of predefined fields into a message. If you are sending to a PoliteMail distribution list, you can also create Custom Fields that can also be used if you wish.
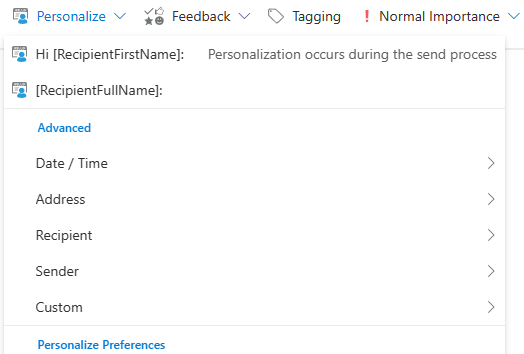
To insert personalization, draft a new message, then select PoliteMail > Personalization and choose the field you want to insert.
The field text is inserted into your message and the data will be replaced (merged) when you Send. When you choose a personalization field, text is inserted into your email message such as “Hi [RecipientFirstName]:”.
Do not edit or change the personalization field name within the square brackets (e.g. “[RecipientFirstName]”). Modifying the placeholder text will prevent personalization from working.
Notes
- Like any other text in your message, you may cut and paste, modify the appearance (font, size and color), or edit the “Hi” to “Hello” or “Dear” by retyping.
- When sending to a PoliteMail mailing list you may use any combination of personalization fields within your email message. However, when there is no corresponding data for a particular contact, it will be left blank.
- When using PoliteMail Distribution Lists, the user has unlimited custom fields for personalization options. If you use a personalization field such as Title or Company, but have not imported the data into a PoliteMail mailing list, then it will be left blank. You also must have measurement (tracking) turned on in order to use Personalization.
- Personalization is limited on Outlook Distribution Groups. When sending to Outlook Distribution Groups, Outlook Contacts or addresses you have typed into the To: field, PoliteMail has access to only the First Name, Last Name, and Email fields.
- Due to limitations in Outlook, personalized fields will only appear in the body of the message and not the subject line. To place custom fields in the subject line, refer to this article for a workaround.

