Applies To: ■ PoliteMail Desktop ■ PoliteMail Online □ PoliteMail M365
Version: ■ 4.9 ■ 5.0 ■ 5.1+
PoliteMail will send measured messages to any current mailing lists you have in your Exchange environment. However, you may want to create additional lists that are not in Outlook. PoliteMail gives you the ability to upload lists for this purpose, usually from a CSV file.
PoliteMail will automatically create a contact when you send a measured email to someone. One of the most common use cases for PoliteMail mailing lists is when you have hundreds of individual e-mail addresses but they are not on a dedicated distribution list. Instead of pasting them all in the To: field, which will increase the size of your e-mail, we recommend you create a PoliteMail list from these contacts.
- A PoliteMail list will reference the recipients from the PoliteMail server, which keeps the message header small and allows for larger recipient lists.
- You can also create list segments, which can allow you to get metrics for and better analyze how your messages are read and received by segments that you have created.
Note: PoliteMail lists are created manually, and they are not updated automatically. Adding contacts to PoliteMail lists are discussed later in this article.
Creating a new PoliteMail List
- Go to Mailing Lists > Mailing Lists. A display of all Mailing Lists you have access to displays.
- Click the '+ New' button at the top, then select 'Contact List'. A panel appears.
- Give the list a name and enter details, such as if it's a subscription, any Business/Region segmentation, or if it's shared. By default, you will be assigned as the Owner.
- Click 'Save'.
- The list is created, now you can populate it with People.
Adding People to a List
You can add People to a List either by 1) adding existing People from the People grid, 2) adding new People to a List manually, or 3) importing People from a .csv file.
1) Adding Existing Contacts to a PoliteMail Mailing List
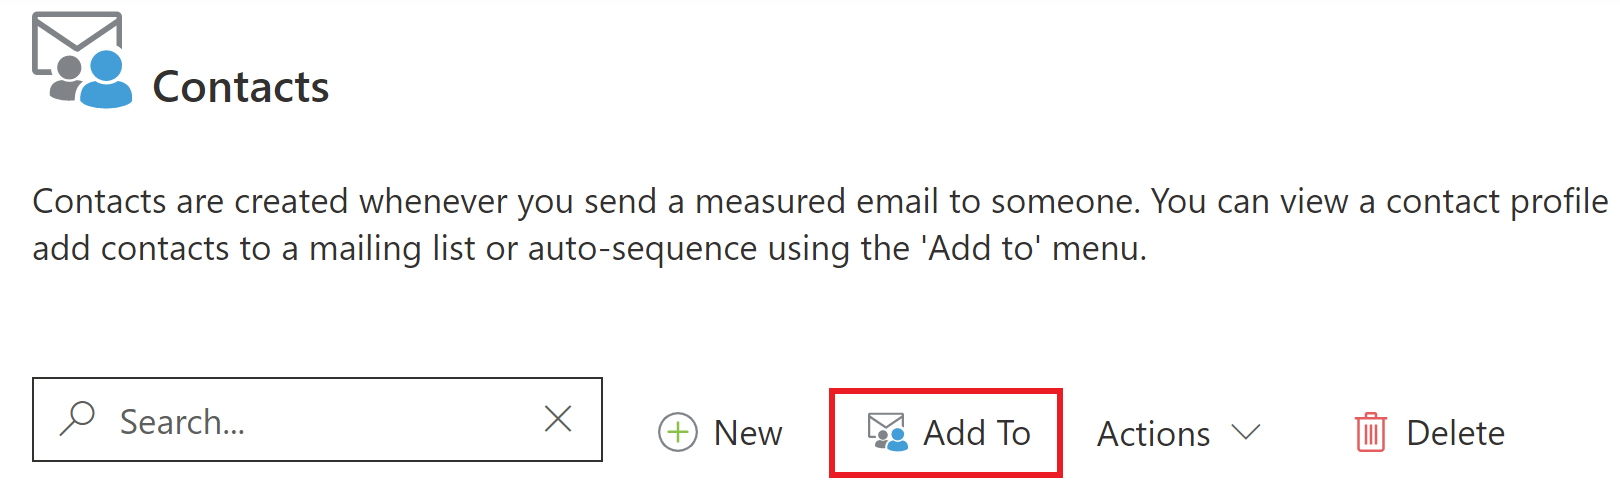 Go to POLITEMAIL > Lists > People.
- Single-click on contacts to select them. Holding down the CTRL key will allow you to select multiple contacts. You can narrow down your contact list by using Search or applying filters.
- Once you have all of your contacts selected, choose Add To. You can then choose which existing mailing list to add these contacts to.
 Go to POLITEMAIL > Lists > People.
2) Adding New People to a PoliteMail Mailing List
- Go to POLITEMAIL > Lists > Mailing Lists and double-click on the list you want to add new contacts to.
- Click the New button and then fill out the contact's information.
3) Importing from a .csv
For instructions on importing from a .csv file, see this article.
Using a PoliteMail Mailing List
When sending out communications, you can send to either a PoliteMail List(s), distribution lists already existing in your Global Address Book, or both.
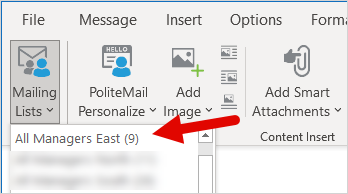 Open a new email. Click the POLITEMAIL tab and choose Mailing Lists.
 - Choose your PoliteMail list.
 Open a new email. Click the POLITEMAIL tab and choose Mailing Lists.
 Once selected, it will be placed in the To: field. It can then be moved into other fields such as the CC: field.
Notes
- You will notice the email address on the list references the hostname to connect to your PoliteMail Server. This means that it will only be recognized by PoliteMail.
- If you attempt to use a PoliteMail list on a message without measurement, it will fail and not deliver.
- For Distribution Lists not stored on your PoliteMail server, we recommend always clicking on To: and pulling the contacts or lists. While the contacts may populate in the field when manually entering them, they are locally cached versions of the list. If any updates or changes have been made to them, they may not be reflected.
