Video Troubleshooting
Due to restrictions with COM Add-ins with Outlook for the Windows desktop, it is recommended to embed video using PoliteMail Online for a better experience.
If embedding video in a PoliteMail message from the desktop version of Outlook isn't working, there a number of things to check.
- First, make sure you have O365 Measurement enabled and you have a valid Sender ID.
- Make sure you have Measurement on for this message. In PoliteMail Online this is automatic, but in other interfaces you will need to click on the PoliteMail flag.
- Make sure the video is stored on a server that everyone can access via their browser (no restrictions).
- Make sure the video is in a .mp4 format; the video URL must end in '.mp4', so videos from YouTube, for example, will not work.
Going Deeper
1: Use the Debugger Tool
 If the above requirements have been met and you're still having trouble, it's time to dig a little deeper with some Developer Tools to diagnose the problem.
- First, from Outlook, click on the 'Get Add-ins' button from the Home tab in the Ribbon. A window showing available add-ins displays.
- Use the search window to search for 'Actionable Messages Debugger' and install it. This add-in is made by Microsoft and will provide diagnostic information that we will need to review.
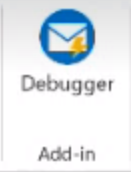
 Now, when viewing a message, you will see the Debugger button in the Add-in group in the Ribbon.
Using the Debugger
When you click the Debugger button while viewing a message, you will see the Debugger panel on the left.
- 'Adaptive Card' displays at the top of the panel If there was an error, it is likely 'False' will display to the right in the field. Click the ^ to collapse the section and reveal the 'Diagnostics' section. Click on it to view the information.

- There are several bits of information to look for in the code that displays:
- ActionableMessageStamping - Errors: any errors in delivery will be described here.
- ActionableMessageStamping - Infos: Look for 'Card allowed for the sender', which indicates the video should go through with no issue.
- AuthHeader: If successful, you will see 'spf=pass'. If spf=fail, check the sender IP shown and verify that it has been added to the SPF record.
2: Review the Connector
- Go to the Actionable Email Developer Dashboard (https://outlook.office.com/connectors/oam/Admin/) and use the drop-down at the top to view Approved connections.
- Click on any connection to view its details, and review the information in the fields:
- Provider ID: This should match the Sender ID in your O365 Measurement setting in PoliteMail.
- Email address of Submitter: Verify that all email addresses in this field are correct. These are the only email addresses you will be able to send from, so it's a good idea to add all you can think of.
- Target URLs: List all of the servers you will send from (for example, list each host URL if you are using multi-tenant).
- You can also use wildcards (*), such as *\pmail5.com/.
It is recommended to do your homework to get all of the needed email addresses and target URLs in and associate them all with one Provider ID for future consistency and ease of use.
- Scope of Submission. You can choose 'Organization' or 'Global' for the scope.
- 'Organization' can be approved by your Change Admin team.
- 'Global' requires some additional information (use case scenario information and information about your Card so it can be verified) and must be approved by Microsoft. However, 'Global' means you can also send the video to vendors or others with a different domain.
3: Review the Video Headers
- Your stored video cannot have any restrictions listed in the header. To check this:
- With the video showing in your browser, go to your Settings > More Tools > Developer Tools (your specific browser menu may vary).
- Click on the Network tab. If you don't see it, you may need to maximize the window or click the >>.

- A list of all components of the web page is shown. Find and click on your .mp4 file.

- The main part of your screen gives information about the file. If it is not selected, click on the Headers tab in the main panel.
- Scroll to the 'Response Headers' section and verify that the 'Access Control Allow Origin' field has a wildcard (*), which means the header is allowing all access.
- If you need to change the setting, click the pencil icon to edit it.
 Now, when viewing a message, you will see the Debugger button in the Add-in group in the Ribbon.