Accessing and Editing a Scheduled Message
- Select the PoliteMail tab within your Outlook window.
- Select Campaigns > Scheduled Sends.
- Click the desired Scheduled Message.
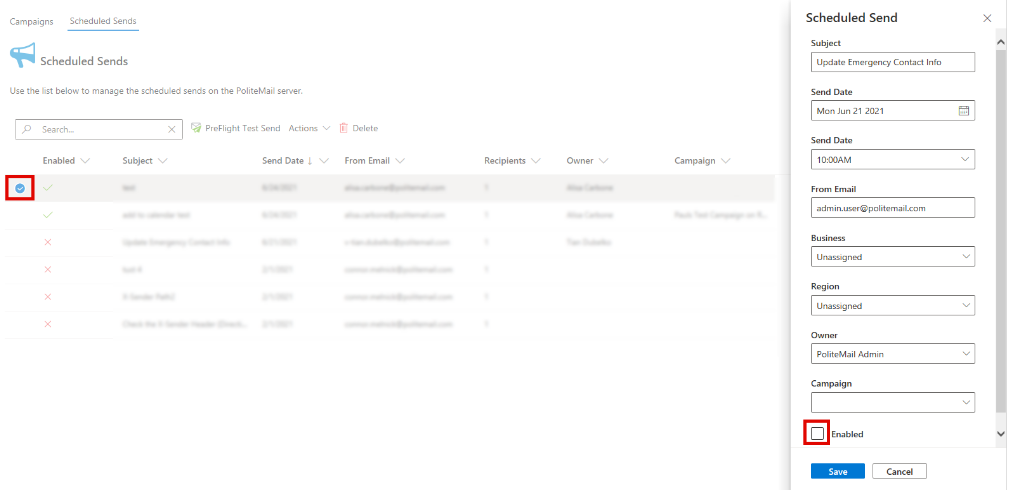
- Version 5.0: Click on the selected message to open up scheduling options, including subject line, scheduled date and time, and/or from email. Click Save when you are done making changes.
- Version 4.9+: Click the Edit button to open up scheduling options, including subject line, scheduled date and time, and/or from email. Click Save when you are done making changes.
NOTE If you needed to change the order of your sends, you can edit the send times so messages go out in your preferred order. You can not change the content of the scheduled send. If you need to change the content, you would have to delete this send and compose and schedule a new one.
- With the message selected you can also send a Preflight Test Send.
Enabling/Disabling a Scheduled Message
If you need to stop a send, you can disable it. Please note that you can not do this if the message is already in the process of being sent.
Version 5.0: Click the message to open the Edit dialog box. Uncheck the enabled box. This will disable the send.
Version 4.9+: Click the message and then the 'Edit' button. Click the button in the second column (an envelope icon with a clock on it) to disable the send.
Disabled Scheduled Sends will still be in Scheduled Sends and you can enable it by checking it again once you are ready for it to go out. If it's past the message's scheduled send time, it will send out immediately.
 Deleting a Scheduled Message
To delete a scheduled send, go to PoliteMail > Campaigns > Scheduled Sends. Click on the message you want to delete and click the Delete button next to Actions (in version 4.9+, click the 'x' button). When you delete a scheduled send, it will prevent the email from going out.
 Deleting a Scheduled Message