Applies To: ■ PoliteMail Online ■ PMUA □ PoliteMail Desktop
Version: □ 4.9 □ 5.0 □ 5.1 □ 5.2 ■ 5.25+
PoliteMail Online features special toolbars that are not available with PoliteMail for the Outlook desktop. A description of these is below. Note that depending on the resolution of your display and the version of PoliteMail you are using, not all of the buttons might be visible.
Click here to view the toolbar layout for version 5.2 and lower.
The new toolbar layout in version 5.25 is designed to be more intuitive in its layout, as well as be more responsive.
Top Row
The top row has additional buttons next to the Send, Save As, and Discard buttons there were previously in the lower toolbars.

- Use this button to select the Measurement Mode.
- Use this button to select a Campaign to assign the message to, if any.
- The Send Options drop down allows you to do a Pre-Flight Test Send, edit the Preheader Text, Suppress Auto-Replies, Schedule the Send, set a Message Expiration, Direct Replies elsewhere, add or remove Opt-Out preferences, choose how to handle List Expansion, disable measurement for iOS or M365, and select the send method (PoliteMail or via Graph).
- Use this button to apply or add a Tag or Tag Group to the message for easy reference in the future.
- The ! button sets the message to high importance, while the ↓ button sets the message to low importance (the default is normal importance). High importance message usually will appear more prominent in a recipient's inbox.
Second Row
The second row of buttons displays underneath the From, To, CC, and Subject fields.

- Select the font from the drop-down list.
- Select the font size from the drop-down list. As a reference, there are 72 points in an inch; standard print sizes are usually 11 or 12 point, while headers or more like 18 to 24 point or larger.
- Click this button to clear all formatting from the selected text. This will remove bold, italics, and any hidden html formatting.
- Use Artificial Intelligence (we use the DeepL translator) to translate the selected text or the entire message. This AI will not only preserve your html formatting and brand styling, but will minimize the chance of any unwanted language change, such as with personalization. Currently, English, Dutch, French, Spanish, Italian, Portuguese, Hindi, and Thai are supported.
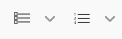
- Use these two buttons to create a bulleted or numbered list; cycle through by clicking more than once to select the specific list type.
- Use these four buttons to insert an image, video (M365 measurement must be enabled first), smart attachment, or link from the PoliteMail Builder.
- Select a personalization field to add to the message.
- Select a type of feedback to display where the cursor is located.
- View the message as HTML.
- Undo or redo.
- Toggle the two toolbars (the second and third, the top is permanently fixed) from above the message window to the below it.
- Expand the window to full screen.
- Open/close the PoliteMail Builder pane.
- The kabob button (three vertical dots) reveals less-used buttons for showing the word count, spell check, auto hyphenation, exporting to PDF, and viewing the message as HTML.
 If some of these buttons appear missing and instead you see the button at left, the width of your screen is such that not all buttons are displaying. Clicking on this button will reveal more.
Third Row

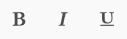
- The first five buttons make the selected text bold, italic, underlined, strikethrough, or superscript.
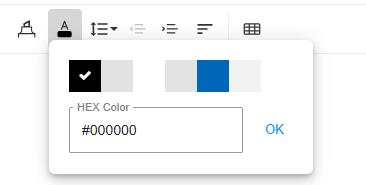 The marker button highlights the selected text, making a light background behind the selection in the color you choose, while the next button lets you select the color of the text itself. Note that the colors from your chosen Brand Theme will also display for you to choose from.
- The first of these four buttons lets you change the space between each character in your selection and/or the line height. The next two will indent or outdent the text, while the fourth allows you to choose if the text is flush right, left, centered, or justified. Note this fourth button is not a drop-down; each time you click on it, the justification will change.
- This final button lets you insert a table with the number of rows and columns you specify.
 The marker button highlights the selected text, making a light background behind the selection in the color you choose, while the next button lets you select the color of the text itself. Note that the colors from your chosen Brand Theme will also display for you to choose from.
Toolbar Layout, PMO version 5.2 and lower
![]() Copy selection to the clipboard
Copy selection to the clipboard
 Paste from the clipboard. If you have multiple items in the clipboard, stored items can be retrieved from storage with the drop down arrow.
![]() Cut the selection to the clipboard.
Cut the selection to the clipboard.
![]() Format painter. Use to copy formatting by selecting the formatting to copy, clicking the button, and then selecting the text to apply the formatting to.
Format painter. Use to copy formatting by selecting the formatting to copy, clicking the button, and then selecting the text to apply the formatting to.
![]() Toggles between viewing the actual message and viewing HTML. Use this button to import and HTML message.
Toggles between viewing the actual message and viewing HTML. Use this button to import and HTML message.
 Select the font or change the font of the selected text.
 Select the font size or change the font size of the selected text.
Font sizing on this toolbar is in pixels (px), not points (pt), whereas the Brand Themes in the PoliteMail Builder uses points. For print, there are 72 points in one inch (if using MS Word, a common text size is 11 or 12 points). The size of text in pixels, however, will vary depending on the resolution of the monitor it is viewed on. As a general rule there are 96 pixels in an inch.
 Set the line spacing.
 Set or change the selected text to bold, italic, and/or underline
 Set or change to select text to either a bulleted list or a numbered list
 Indent (move right) or outdent (move left) the cursor or selected text.
 Set the cursor or selected text to be left-justified, right-justified, or centered.
![]() Clear all formatting from the selected text.
Clear all formatting from the selected text.
 Select the predefined paragraph style for the paragraph, such as Normal, Heading 1, etc.
 Select the color. A tab appears in the menu to select either the text color or the background color.
![]() Insert an online picture. You will need the URL of the image; you can only upload an image via the PoliteMail Builder.
Insert an online picture. You will need the URL of the image; you can only upload an image via the PoliteMail Builder.
![]() Insert an online video. You will need either the URL of the video or the embed code; you can only upload video via the PoliteMail Builder.
Insert an online video. You will need either the URL of the video or the embed code; you can only upload video via the PoliteMail Builder.
![]() Insert an online file. This is usually text that you can quickly insert. You will need the URL of the file to insert.
Insert an online file. This is usually text that you can quickly insert. You will need the URL of the file to insert.
![]() Insert or create a hyperlink.
Insert or create a hyperlink.
![]() Spell-check your message. Possible spelling errors will display a red underline, and possible grammatical errors will display a blue underline.
Spell-check your message. Possible spelling errors will display a red underline, and possible grammatical errors will display a blue underline.
![]() Show the word count display. This small window will display the estimated read time, word count, reading ease score, and approximate grade level of the message.
Show the word count display. This small window will display the estimated read time, word count, reading ease score, and approximate grade level of the message.
![]() Turn on or off auto-hyphenation. Hyphenation will only appear on the recipient’s view.
Turn on or off auto-hyphenation. Hyphenation will only appear on the recipient’s view.

Toggle from displaying the toolbar above your message or at the bottom.
 Enables gridline resizing. When using a template or table, allows you to use your mouse to drag the borders to resize.

Show blocks. Will display an outline of each block used in your Template for easy viewing. This does not effect how the message will be displayed to the recipients.
 Export the currently displayed message as a PDF.
The following are other buttons you may find, depending on your instance of PoliteMail:
 Insert an HTML Class name, such as Warning or Activated. This will typically only be viewable in HTML view.
 Adjust the line spacing.
 Set the cursor or selected text to be superscript or subscript.
![]() Select all text in the message.
Select all text in the message.
![]() Insert a horizontal line across the page. This is useful if you need a horizontal line from margin to margin regardless of screen resolution.
Insert a horizontal line across the page. This is useful if you need a horizontal line from margin to margin regardless of screen resolution.
![]() Opens a list of special characters to insert in your message, such as special symbols or small icons.
Opens a list of special characters to insert in your message, such as special symbols or small icons.
 Search for specific text in the message. Use the drop-down find the next instance, previous instance, or replace the text with something else.
![]() Expand the window to full-size. The button changes to
Expand the window to full-size. The button changes to ![]() when clicked; click it to return to reduced size.
when clicked; click it to return to reduced size.
![]() View a preview of your message in a pop-up window. This is useful with embeds or HTML.
View a preview of your message in a pop-up window. This is useful with embeds or HTML.
![]() Open a print dialog to print the message.
Open a print dialog to print the message.
![]() About Froala. Froala is a customizable toolbar set of code used by PoliteMail Online.
About Froala. Froala is a customizable toolbar set of code used by PoliteMail Online.

